


Using your cast iron cookware

Firstly, pre-heat your Cast Iron Cookware. It’s important when cooking on a camp fire to establish a good supply of coals. It is best to use slow burning wood such as hardwoods to achieve these coals.
When you are ready to begin cooking, shovel some coals out of the fire and spread them out off to the side of the fire pit, creating an area a little larger than the Camp Oven, take care not to use too many coals. Make sure you have adequate safety precautions in place to prevent fire spreading and injury.
 Place the Camp Oven on top of the coals with your food inside. Make sure the lid is on securely. Place a shovel full of coals on top of the lid, be careful not to use too much as this may cause the contents to burn. You can check your food during cooking, if it is cooking too slowly more coals can be added on top of the lid. Never cook directly in the campfire coals, these will be too hot and will burn your food. Make sure your campfire has been extinguished fully when finished.
Cast iron care & maintenance
All Outdoor Connection Cast Iron Products are Pre-Seasoned for your convenience. It is important to maintain the seasoning on your Cast Iron Cookware as this will prevent rust from forming and also creates a non-stick layer inside the Cast Iron. Seasoning your Cast Iron can be done in the kitchen oven, BBQ or on an open campfire (if you use your kitchen oven it may get smoky inside as the oil burns off – make sure the area is well ventilated).
What is seasoning?
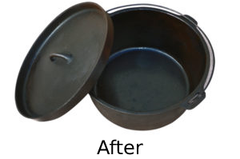
Seasoning prepares the inside surface of the Cast Iron, ready for cooking. A well-seasoned camp oven will have a hard black exterior and will provide many years of use.
Cleaning your cast iron cookware
Simply scrape out any remaining food and clean with hot water and a natural fibre brush, allow to completely dry by sitting in the sun or near the fire. To remove any stuck on foods simply cover with warm water then heat until nearly boiling, the food should be removed easily with a gentle scrub. DO NOT use detergents or soap as this will not only taint your food but destroy the protective seasoned coating on your Camp Oven. Before storing, wipe the Camp Oven inside and out with some vegetable oil using paper towel.

Storing your cast iron cookware
Once you have finished using your Cast Iron Cookware make sure it is clean then wipe all over (inside and out) with a thin layer of Vegetable oil using a paper towel to apply.
Cast Iron Cookware can break and should be treated with care. Wrap your cookware in canvas or a towel to protect it from being damaged and to keep it free from dust and dirt.
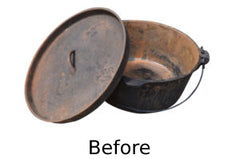
Reviving your cast iron
When the seasoning breaks down, rust may form. It is important to remove all the rust as this will give your food a nasty metallic taste.
Firstly, scour off as much rust as possible then wash thoroughly with warm soapy water (this will be the only time you will use detergent on your Cast Iron). Rinse all detergent from the Cast Iron then dry thoroughly.
- Preheat oven or BBQ to 200 degrees. Place the dry Camp Oven
in the centre with the lid slightly ajar. It needs to heat slowly to
a temperature where it is just too hot to handle with bare hands
This process forces any remaining moisture out and expands the
pores of the metal. - Apply a thin layer of Vegetable Oil using a paper towel. Make sure
the entire Camp Oven is covered inside and out. - Return the Camp Oven to the stove or BBQ placing it upside
down (this stops the oil pooling in the bottom)rest the lid on the
top for approximately 1 hour at 200 degrees. This will harden
the oil creating a protective coating. - Remove the Camp Oven and allow it to cool slowly, when cool
enough repeat the above process. - Remove and allow it to cool again then apply a thin layer of oil
Make sure all of the oil is absorbed and does not pool (this will
spoil in the Camp Oven and ruin your seasoned coating).
Your Camp Oven should now have a shiny hard black finish and is ready to use again.
Temperature Guide
To check the temperature of your Camp Oven, simply drop a piece of white paper in first. After a few minutes check the colour of the paper against the guide below:

Make Life Easier
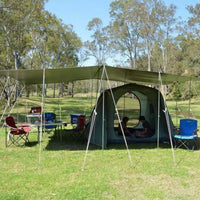
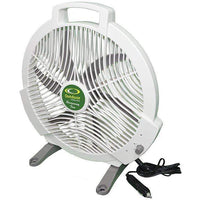
Remembering a few essential items can make all the difference when camping.
Don’t forget to pack:


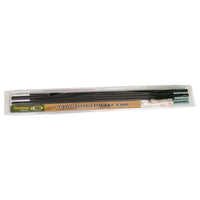
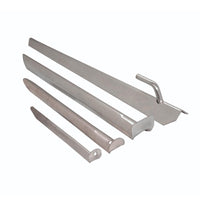
Connection Peg Puller / Lid Lifter – lift the lid to check or serve your delicious meal, use to scrape the coals off the top of your Camp Oven or use it to lift your Camp Oven / Billy from the coals.
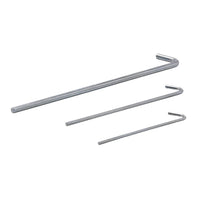
This handy 2 in 1 tool can also be used to effortlessly remove your tent pegs.
Long Handled Shovel – don’t burn your hands using a small shovel. A long-handled shovel will allow you to get coals from the fire for cooking.
Leather Gloves – Reduce the risk of burning hands when moving Camp Oven.
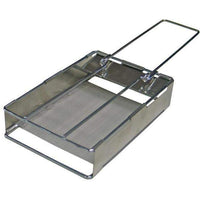
Wire Trivets – To prevent food from sticking to the bottom of Camp Oven. Great when roasting or baking.